Setting Up Cox email in Outlook 365 – A Comprehensive Guide
Updated On - October 10, 2024 by Henry Bray | Reading Time: 3 minutes
Setting up your Cox email in Outlook 365 can improve your communication and enhance your productivity by bringing all your emails under one roof. Whether you’re using Outlook 365 on a Windows or Mac computer, the process is fairly straightforward. This comprehensive guide will walk you through each step of the setup process, from gathering necessary information to troubleshooting common issues. Additionally, we will explore the professional tool Regain Email Migration Tool to easily convert Cox Email to Office 365.
Reasons to Move Cox Email in Outlook 365
Office 365 is the most used Email client in the world. Therefore, there are many benefits to transfer Cox Email to Outlook 365. Let’s discuss the advantages to add Cox Email to Office 365.
- Access Anywhere: Office 365 is cloud-based, so you can access your email from any device, anywhere.
- Better Collaboration: It can easily integrate with Microsoft apps like Word, Excel, and Teams for easy sharing and teamwork.
- Strong Security: Additionally, Outlook 365 provides top-notch security features to protect your emails and data.
- Reliable Service: Offers a 99.9% uptime guarantee, ensuring your email is always available.
- Scalable Plans: Flexible subscription plans that can grow with your needs.
- Large Storage: Generous mailbox storage, often starting at 50GB per user.
- Easy Management: Centralized admin tools for simple user and policy management.
- Cost-Effective: Reduces the need for on-premises infrastructure and maintenance costs.
Pre-Setup Preparation Before Migrating Cox Email in Office 365
This section will discuss the necessary prerequisites to make the process of adding Cox Email in Outlook 365 easy. Moreover, gather the required information from the section below.
- Cox Email Address: Your full Cox email address (e.g., username@cox.net).
- Password: Your Cox email account password.
- Incoming Mail Server: imap.cox.net (for IMAP) or pop.cox.net (for POP).
- Outgoing Mail Server: smtp.cox.net.
- Incoming Server Port: 993 (IMAP) or 995 (POP) for secure connections.
- Outgoing Server Port: 587 for secure connections.
- SSL/TLS Settings: Ensure SSL/TLS is enabled for incoming and outgoing servers.
Professional Way for Setting Up Cox Email in Outlook 365
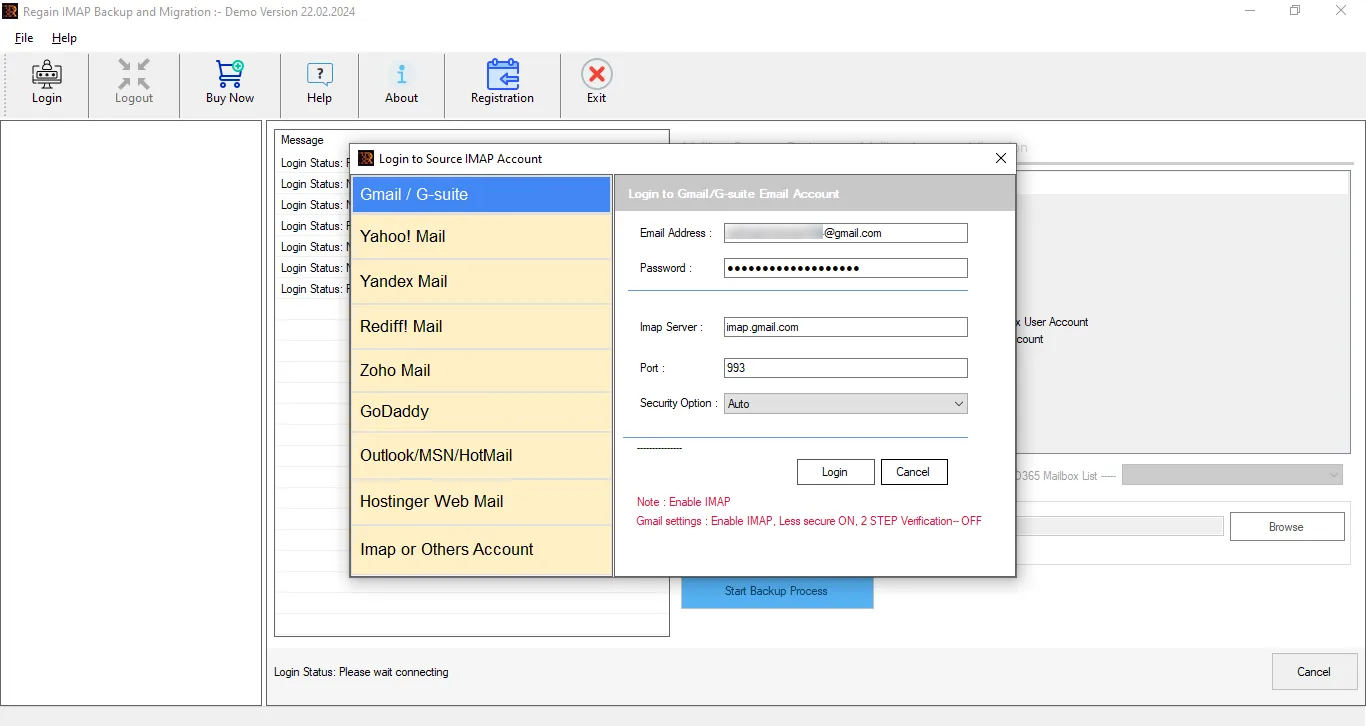
The Regain Email Migration Tool is designed specifically to facilitate the seamless backup of COX email to Office 365, eliminating any potential errors. This software enables users to effortlessly integrate COX emails into Office 365 through a unified process. For a detailed, step-by-step tutorial on adding COX email to the Office 365 database, users can consult the accompanying instructional guide.
Free Download100% Secure Buy NowPrice: $99
- Install and launch the Email Migration Tool as an administrator.

- Select Cox Email and enter the credentials. Then click on the Login button.
- Preview and choose the Files/Folders from the tree structure format.
- Opt for the Optional Features/Filters.
- Finally, select Office 365 as the saving format and enter the Credentials. Then click on the button Start Backup Process.
Manually Setting Up Cox Email on Outlook 365 for Windows
The process of manually adding Cox Email in Office 365 can be quite challenging. Therefore, we have divided the entire process into seven steps.
Step1: Open Outlook 365
- Launch Outlook 365 on your Windows PC.
- Click on the File tab in the top-left corner of the window.
Step2: Add a New Account
- In the Info category, click on Add Account.
- A new window will appear prompting you to enter an email address.
Step3: Enter Your Cox Email Address
- Type in your full Cox email address and click on Connect.
Step4: Choose Account Type
- Select IMAP or POP. IMAP is generally recommended as it allows synchronization across multiple devices.
Step5: Enter Server Settings
1. Incoming Mail Server:
- IMAP: ‘imap.cox.net’
- POP: ‘pop.cox.net’
2. Outgoing Mail Server:
- SMTP: ‘smtp.cox.net’
3. Ensure the following port numbers are correct:
- IMAP: 993
- POP: 995
- SMTP: 587
4. Enable SSL/TLS for both incoming and outgoing servers.
Step6: Authenticate
- Enter your Cox email address and password.
- Click on Next to proceed.
Step7: Complete Setup
- Outlook will test the connection to ensure the settings are correct.
- Once the test is successful, click on Finish.
Drawbacks of the Manual Method of Adding Cox Email in Outlook 365
- Complex Process: It can be complicated for users, especially those with limited technical skills.
- Potential Errors: Manual entry increases the risk of mistakes, leading to connectivity issues or email synchronization problems.
- Time-Consuming: Setting up emails manually can take a significant amount of time, causing delays in accessing emails.
- No Automation: Unlike automated methods, manual setup lacks the convenience of streamlined processes.
- Security Concerns: Incorrect configurations may pose security risks, such as unauthorized access to emails.
- Limited Support: Users may struggle to find assistance or troubleshooting help during the setup process.
- Maintenance Needed: Regular maintenance is required to keep configurations up-to-date with changes in Office 365.
Conclusion
Setting up Cox email in Outlook 365 enhances your email management capabilities by centralizing your communications. By following the steps outlined in this guide, you can ensure a smooth and secure setup process. Moreover, use the Regain Email Migration Tool to efficiently set up Cox Email in Outlook 365. Regularly updating your settings and being aware of common troubleshooting steps will keep your email running efficiently. With Cox email integrated into Outlook 365, you’ll enjoy the convenience and productivity that comes with having all your emails in one place.

